Web Development Resource Process: From Planning to Deployment
Web development is a lot like cooking your favorite dish. You need the right ingredients (resources), a clear recipe (workflow), and a talented chef (team) to bring it all together. The only problem? If you don’t plan well, you might end up with a half-baked product—or worse, a digital disaster. That’s where the web development resource process comes in!
In this ultimate guide, I’ll walk you through every stage of the process, from defining project goals to launching your site. Whether you’re a web wizard or just dipping your toes into the digital world, this guide has got you covered. Plus, you’ll even get a glossary because let’s face it—web development has its own secret language.
Web Development Resource Process: From Planning to Deployment
The Ultimate Guide to My Web Development Resource Process
Glossary for the Web Development Resource Process
1. CMS (Content Management System)
6. API (Application Programming Interface)
11. SSL (Secure Sockets Layer)
14. SEO (Search Engine Optimization)
How This Glossary Fits into the Web Development Resource Process
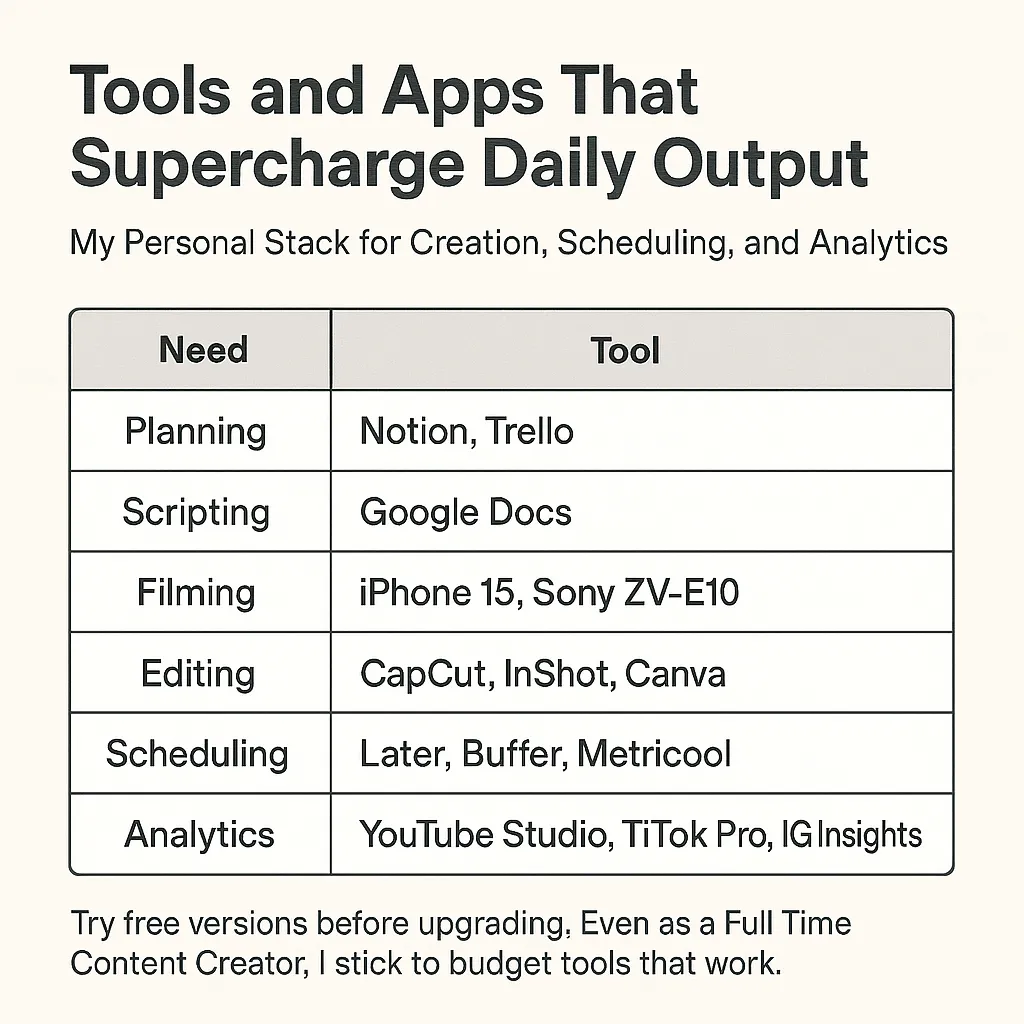
The Web Development Resource Toolkit for Every Stage of the Process
Why a Toolkit is Essential for the Web Development Resource Process
Stage 1: Planning and Organization
Pro Tip: Use Gantt charts to visualize your timeline and break your web development project into manageable phases.
Stage 2: Design and Prototyping
Best Design and Prototyping Tools:
Pro Tip: Use drag-and-drop design templates to save time and focus on functionality.
Stage 3: Front-End Development
Essential Front-End Development Tools:
Pro Tip: Use browser extensions like WhatFont or ColorZilla to quickly identify fonts and color codes for consistency.
Pro Tip: Choose a back-end language and framework that aligns with your project’s scalability and complexity needs.
Stage 5: Testing and Debugging
Pro Tip: Conduct both manual and automated testing for a thorough QA process.
Stage 6: Deployment and Hosting
Pro Tip: Always use a staging environment to test your site before the final deployment.
Stage 7: Maintenance and Optimization
Pro Tip: Schedule monthly audits to review site performance, update plugins, and address any emerging issues.
Bonus Resources for Every Stage
Goals of Web Development Resource Process
Define Project Goals and Scope
Example: Freelance Writer Portfolio
Steps to Define Project Goals and Scope
Assemble the Dream Team for the Web Development Resource Process
Key Roles in the Web Development Resource Process
When and How to Assemble the Team
Utilize Freelancers or Agencies
Create a Collaborative Environment
Additional Testing to Consider
Choose the Right Tools and Technologies
Key Categories of Tools and Technologies
Tips for Selecting the Right Tools
Plan Your Development Workflow
Why a Workflow is Critical in the Web Development Resource Process
Common Development Methodologies
Steps to Plan Your Development Workflow
Integrating Workflows into the Web Development Resource Process
Web Development Resource Process: From Planning to Deployment

The Ultimate Guide to My Web Development Resource Process
Let's Start With A Glossary
Glossary for the Web Development Resource Process
When diving into the web development resource process, it’s easy to get overwhelmed by all the technical jargon. Whether you’re new to web development or need a refresher, this glossary will help you navigate the essential terms used throughout the process. By understanding these terms, you’ll feel more confident managing resources, communicating with your team, and ensuring your project’s success.
1. CMS (Content Management System)
A Content Management System (CMS) is a platform that allows you to create, manage, and modify content on a website without needing to code.
Examples: WordPress, Shopify, Joomla.
Why It Matters in the Web Development Resource Process: A CMS simplifies website management, saving time and reducing the need for extensive development resources.
2. Wireframes
A wireframe is a visual blueprint or skeletal layout of a web page. It outlines the structure of the page, showing where elements like menus, buttons, and images will appear.
Why It’s Important: Wireframes provide a clear roadmap for designers and developers, ensuring the project stays on track during the web development resource process.
Tool Tip: Figma or Adobe XD can help you create digital wireframes.

3. Prototypes
A prototype is a more advanced version of a wireframe that includes interactivity. It allows stakeholders to experience how the website will function before the development begins.
Why It Matters: Prototypes minimize misunderstandings and allow you to gather feedback early in the web development resource process.
4. Front-End Development
The front end refers to the visual part of a website—the part users interact with. This includes everything from the layout and design to buttons and navigation.
Languages Used: HTML, CSS, JavaScript.
Relevance to the Web Development Resource Process: Effective front-end development ensures a smooth and engaging user experience.
5. Back-End Development
The back end is the behind-the-scenes part of a website. It manages the server, database, and application logic.
Languages Used: PHP, Python, Ruby, Node.js.
Why It’s Essential: The back-end powers the functionality of the website, from user authentication to storing and retrieving data.
6. API (Application Programming Interface)
An API is a set of rules and protocols that allow different software applications to communicate with each other.
Example: Using a payment gateway API like Stripe to process transactions.
Importance in the Web Development Resource Process: APIs enable seamless integration of third-party tools and features, saving development time and resources.
7. Sprints
In Agile development, a sprint is a set period (usually 1-2 weeks) during which a specific set of tasks is completed.
Why It’s Important: Sprints break the web development resource process into manageable chunks, ensuring steady progress and quick adjustments.
8. Responsive Design
Responsive design ensures that a website looks and functions well on devices of all sizes, from desktops to smartphones.
Tools Used: CSS frameworks like Bootstrap.
Relevance: In today’s mobile-first world, responsive design is a non-negotiable step in the web development resource process.
9. Version Control
Version control systems, like Git, allow developers to track code changes and collaborate efficiently.
Why It’s Vital: Version control prevents errors and ensures everyone on the team is working on the most updated version of the project.
10. Hosting
Hosting refers to the service that makes your website accessible on the internet.
Examples: AWS, Bluehost, Netlify.
Relevance to the Web Development Resource Process: Choosing the right hosting provider impacts your site’s speed, security, and scalability.
11. SSL (Secure Sockets Layer)
An SSL certificate encrypts the connection between a user’s browser and your website, ensuring data security.
Why It’s Crucial: SSL is mandatory for protecting user data and boosting SEO.
12. UX/UI Design
UX (User Experience): Focuses on how users interact with and experience the website.
UI (User Interface): Deals with the visual design and layout of the site.
Relevance: Strong UX/UI design enhances usability and keeps visitors engaged.
13. Deployment
Deployment is the final step of the web development resource process, where your website goes live on the internet.
Tools Used: FTP, CI/CD pipelines, or platforms like Heroku.
Tip: Always test thoroughly before deploying to avoid post-launch issues.
14. SEO (Search Engine Optimization)
SEO involves optimizing your website to rank higher on search engines like Google.
Why It Matters: SEO drives organic traffic, making it a critical consideration in the web development resource process.
15. Debugging
Debugging is the process of identifying and fixing errors in the code.
Tools Used: Chrome DevTools, Firebug.
Tip: Always debug in stages to isolate and fix problems efficiently.
How This Glossary Fits into the Web Development Resource Process
Understanding these terms can drastically improve how you allocate resources, communicate with your team, and manage your project timeline. For example, knowing the difference between a wireframe and a prototype ensures you’re not wasting resources on unnecessary revisions. Similarly, using version control tools like Git can prevent major setbacks during development.
By familiarizing yourself with these key terms, you’ll navigate the web development resource process with confidence and clarity. Bookmark this glossary, and you’ll always have a reliable resource to guide you! 🚀

The Web Development Resource Toolkit for Every Stage of the Process
The web development resource process can be daunting, especially if you’re unsure which tools and platforms to use at each stage. To simplify things, I’ve compiled a comprehensive toolkit that covers everything from planning and prototyping to testing and deployment. Whether you’re a solo developer, part of a team, or managing a project, these resources will keep your process streamlined and efficient.
Why a Toolkit is Essential for the Web Development Resource Process
The web development resource process involves multiple stages, each requiring specific tools to manage tasks, optimize workflows, and ensure a smooth development cycle. A well-chosen toolkit saves time, reduces errors, and enhances collaboration—critical elements for success in today’s fast-paced development landscape.
Stage 1: Planning and Organization
The foundation of the web development resource process lies in effective planning and organization. The right tools can help you define goals, allocate resources, and track progress efficiently.
Top Tools for Planning:
Notion: A flexible tool for creating project roadmaps, to-do lists, and team collaboration spaces.
Trello: A simple Kanban board system to organize tasks and monitor progress visually.
Asana: Great for task management, especially for larger teams.
Google Workspace: Use Docs and Sheets for collaborative brainstorming and tracking.
Pro Tip: Use Gantt charts to visualize your timeline and break your web development project into manageable phases.
Stage 2: Design and Prototyping
Creating wireframes and prototypes is a crucial part of the web development resource process. This stage allows you to visualize the layout and functionality of the website before any coding begins.
Best Design and Prototyping Tools:
Figma: My go-to for collaborative wireframing and prototyping. It’s browser-based and user-friendly.
Adobe XD: Ideal for high-fidelity designs and interactive prototypes.
Sketch: A favorite for UI/UX designers working on macOS.
InVision: Perfect for building clickable prototypes and gathering stakeholder feedback.
Pro Tip: Use drag-and-drop design templates to save time and focus on functionality.
Stage 3: Front-End Development
Front-end development focuses on the look and feel of the website. Choosing the right frameworks and libraries ensures your site is responsive, fast, and visually appealing.
Essential Front-End Development Tools:
Visual Studio Code (VS Code): A powerful and lightweight code editor.
Bootstrap: A popular CSS framework for building responsive, mobile-first websites.
React.js: My preferred library for creating dynamic and interactive user interfaces.
Tailwind CSS: Great for customizing styles with utility-first CSS.
Pro Tip: Use browser extensions like WhatFont or ColorZilla to quickly identify fonts and color codes for consistency.
Stage 4: Back-End Development
The back end is the engine that powers your website. This stage of the web development resource process involves setting up servers, databases, and APIs.
Back-End Development Tools:
Node.js: Excellent for building scalable server-side applications.
Django: A high-level Python framework for fast and secure development.
MySQL or PostgreSQL: Reliable database management systems.
Postman: Perfect for testing and debugging APIs.
Pro Tip: Choose a back-end language and framework that aligns with your project’s scalability and complexity needs.
Stage 5: Testing and Debugging
Testing is a non-negotiable part of the web development resource process. It ensures your website functions correctly, is secure, and provides a smooth user experience.
Top Testing Tools:
Selenium: An automated testing tool for web applications.
BrowserStack: Helps test your site across different browsers and devices.
Jest: A JavaScript testing framework for front-end and back-end code.
Lighthouse (Google Chrome): Evaluates site performance, accessibility, and SEO.
Pro Tip: Conduct both manual and automated testing for a thorough QA process.
Stage 6: Deployment and Hosting
Deploying the website is the final step in the web development resource process, but it’s just as important as the earlier stages. Choosing the right hosting provider and deployment tools ensures your site performs well and remains reliable.
Deployment and Hosting Tools:
Netlify: Great for deploying static sites with ease.
Heroku: Ideal for deploying web applications without extensive server management.
Amazon Web Services (AWS): A robust solution for large-scale, enterprise-level hosting.
Cloudflare: Enhances website performance and provides security.
Pro Tip: Always use a staging environment to test your site before the final deployment.
Stage 7: Maintenance and Optimization
The web development resource process doesn’t end with deployment! Maintenance and optimization ensure your website stays fresh, secure, and competitive.
Maintenance Tools:
Google Analytics: Tracks user behavior and site performance.
UptimeRobot: Monitors your website’s uptime and notifies you of any downtime.
Ahrefs or SEMrush: For ongoing SEO optimization and keyword tracking.
BackupBuddy: Creates regular backups to safeguard your data.
Pro Tip: Schedule monthly audits to review site performance, update plugins, and address any emerging issues.
Bonus Resources for Every Stage
Version Control: Use GitHub or GitLab to manage code repositories.
Collaboration: Tools like Slack keep communication seamless during the project.
Design Assets: Platforms like Unsplash and Canva provide free images and graphics for web design.
The web development resource process becomes significantly smoother when you have the right toolkit at your disposal. Each stage—planning, design, development, testing, deployment, and maintenance—benefits from specialized tools that save time and enhance quality.
By integrating these resources into your workflow, you can streamline your process, reduce errors, and deliver exceptional results.
Goals of Web Development Resource Process
Define Project Goals and Scope
Every successful web development project starts with a clear vision. For me, this step lays the foundation for the entire web development resource process, ensuring that every decision made along the way aligns with the project’s objectives. Without defining goals and scope, it’s easy for the project to lose focus and waste valuable resources.
Key Questions to Ask
To define the project’s goals and scope, I ask a few critical questions:

What’s the Purpose of the Website?
The website’s purpose dictates its design, features, and functionality. Is it a portfolio to showcase work, an e-commerce site to sell products, or a blog to share ideas?Example: A portfolio site prioritizes aesthetic appeal and easy navigation, while an e-commerce site focuses on a robust shopping experience with secure payment options.
Who’s the Target Audience?
Understanding the target audience ensures that the website resonates with its users.Example: A website targeting corporate clients will have a professional tone and clean design, whereas a site for creatives might focus on bold visuals and interactive elements.
What are the Must-Have Features?
Identifying core features upfront avoids unnecessary delays and keeps the team focused.Example: A blog requires a content management system (CMS) and a search function, while an e-commerce site needs a shopping cart, product pages, and checkout integration.
Example: Freelance Writer Portfolio
When I worked on a portfolio website for a freelance writer, defining goals and scope was essential. The primary goal was to showcase their writing samples and make it easy for clients to contact them. Here’s how I approached it:
Must-Haves:
Writing samples organized by category.
A responsive, mobile-friendly design.
A simple contact form for inquiries.
Nice-to-Haves:
A blog section for sharing writing tips.
Testimonials from previous clients.
By separating must-haves from nice-to-haves, I ensured the project met its core objectives while leaving room for future updates.
Steps to Define Project Goals and Scope
Write a Project Brief
A project brief is the starting point for defining goals. It includes the website’s purpose, audience, and core deliverables.
Example: "This project aims to create a portfolio site for a graphic designer, showcasing their work and providing an easy way for potential clients to reach out."
Create a Feature Checklist
To stay organized, I list features in two categories:
Essential Features: These are non-negotiable elements the website needs to fulfill its purpose.
Example: Responsive design, SEO optimization, and user-friendly navigation.
Optional Features: These can be added later as time or budget allows.
Example: Advanced animations, multilingual support, or a blog section.
Use Tools for Organization
I rely on project management tools to track the scope and progress:
Notion or Trello: For creating task boards and breaking down features into actionable steps.
Google Docs: For collaborative project briefs and feature lists.
Figma or Adobe XD: For visualizing initial designs and layouts.
Why This Step is Essential
Defining the project goals and scope early in the web development resource process helps:
Prevent scope creep by setting clear boundaries.
Save time by focusing only on what’s necessary.
Ensure that the entire team understands the project’s purpose and direction.
By starting with a clear vision, I can ensure that the final product meets the client’s expectations and delivers a seamless user experience.

Assemble the Dream Team for the Web Development Resource Process
One of the most critical parts of the web development resource process is assembling the right team. A strong, well-balanced team can make the difference between a chaotic project and a seamless one. Depending on the size and complexity of the website, I ensure specialists are involved in key areas to handle every aspect of the project expertly.
Key Roles in the Web Development Resource Process
1. Front-End Developers
What They Do:
Front-end developers are responsible for the visual and interactive aspects of the website. They use languages like HTML, CSS, and JavaScript to bring the design to life. Their job includes ensuring the website looks great on all devices and offers a smooth user experience.Example:
On an e-commerce project, a front-end developer might create a dynamic shopping cart that updates in real-time as users add or remove items.Skills to Look For:
Proficiency in frameworks like React, Angular, or Vue.js.
Attention to detail when implementing designs and responsiveness.
2. Back-End Developers
What They Do:
Back-end developers manage the behind-the-scenes functionality of a website, such as server-side operations, databases, and APIs. They ensure that the website is scalable, secure, and performs efficiently.Example:
For a membership website, a back-end developer would build a secure login system to encrypt user data and manage access to premium content.Skills to Look For:
Expertise in languages like PHP, Node.js, Python, or Ruby.
Knowledge of database systems such as MySQL or MongoDB.
Experience with creating scalable architectures.
3. Designers
What They Do:
Designers focus on creating stunning UI/UX layouts that are visually appealing and intuitive to navigate. They translate the project’s goals into wireframes, prototypes, and final designs.Example:
On a portfolio website, a designer might craft a layout that showcases work samples prominently, ensuring visitors can quickly access relevant information.Skills to Look For:
Proficiency in design tools like Figma, Adobe XD, or Sketch.
Strong understanding of user experience (UX) principles and best practices.
4. Project Managers
What They Do:
A project manager acts as the glue that holds the team together. They coordinate between developers, designers, and stakeholders, ensuring tasks are completed on time and within budget.Example:
On a restaurant website project, a project manager might organize weekly check-ins, track progress on tasks like building the menu page, and address any roadblocks.Skills to Look For:
Strong organizational and communication skills.
Experience with tools like Trello, Asana, or Jira.
The ability to manage multiple moving parts efficiently.
When and How to Assemble the Team
Start Small and Scale Up
For smaller projects, a single full-stack developer who handles both front-end and back-end tasks might be sufficient. However, for larger or more complex websites, I always prefer assembling a team of specialists to ensure each component is handled with expertise.
Utilize Freelancers or Agencies
When working with limited budgets, I turn to platforms like Upwork, Toptal, or Fiverr to find skilled professionals for short-term projects. For larger projects with more substantial budgets, I recommend hiring a web development agency to provide an all-in-one solution.
Create a Collaborative Environment
To ensure smooth teamwork and effective communication, I set up:
Collaboration Tools:
Slack for messaging and updates.
Trello or Asana for task management.
GitHub for version control and code sharing.
Regular Check-Ins:
Weekly or bi-weekly meetings to discuss progress, challenges, and any changes in the project scope.
The Dream Team in Action
Here’s an example of how assembling the right team transformed a project for me. While building a website for a local non-profit organization, I collaborated with:
A front-end developer to create a responsive and engaging donation page.
A back-end developer to integrate secure payment gateways for online donations.
A designer to craft an inviting color scheme and user-friendly navigation.
A project manager to oversee deadlines and coordinate tasks among team members.
This collaboration resulted in a website that increased donations by 30% within the first month of launch!
In the web development resource process, assembling the dream team is one of the most valuable steps. By carefully selecting skilled professionals for front-end development, back-end development, design, and project management, I can ensure that every project runs smoothly and exceeds expectations.
Build and Test
With all resources and plans in place, the web development resource process transitions into the development and testing phase. This is where ideas, designs, and strategies turn into a fully functional website. Building and testing are critical stages that ensure the site works seamlessly, delivers an excellent user experience, and meets project goals.
Steps to Build the Website
1. Front-End Development
Front-end development focuses on the visual and interactive aspects of the website—the parts that users see and interact with.
Key Tasks:
Implementing the layout and design based on wireframes and prototypes.
Ensuring responsive design for seamless use across devices.
Adding interactivity, such as animations, sliders, and dropdown menus.
Tools Used: HTML, CSS, JavaScript, and front-end frameworks like React or Angular.
Example:
For an e-commerce site, the front-end developer would create a dynamic shopping cart that updates in real-time as users add or remove items.
2. Back-End Development
Back-end development handles the server-side functionality, including database management, server operations, and APIs. It ensures that the front end can communicate with the back end to deliver a smooth experience.
Key Tasks:
Setting up servers and databases.
Writing server-side scripts to handle form submissions, user authentication, and payment processing.
Building APIs to connect the back-end to the front-end.
Tools Used: Languages like PHP, Python, Ruby, or Node.js, and databases like MySQL or MongoDB.
Example:
For a membership website, the back-end developer would build a secure login system that encrypts user credentials and grants access to premium content.
Steps to Test the Website
Once development is complete, testing ensures the website is functional, compatible, and ready for users. I follow a thorough testing process to catch and fix issues before launch.
Types of Testing to Conduct
1. Unit Testing
Purpose: Test individual components or features of the website in isolation.
Example: Testing a form submission feature to ensure it captures and sends data correctly.
2. Integration Testing
Purpose: Verify that different modules or components work together as intended.
Example: Ensuring that the front-end shopping cart connects properly with the back-end inventory system.
3. User Testing
Purpose: Evaluate the website’s usability and overall experience from an end-user’s perspective.
Example: Observing how users navigate a blog site to see if they can easily find and read articles.
Additional Testing to Consider
Performance Testing: Measure the website’s load times and response under different conditions. Tools like Google PageSpeed Insights and GTmetrix help identify areas for improvement.
Compatibility Testing: Ensure the website functions correctly on all major browsers (Chrome, Safari, Firefox, etc.) and devices.
Security Testing: Check for vulnerabilities in user authentication, data handling, and third-party integrations.
The Build and Test Workflow
Here’s how I typically structure the build and test process:
Start with Front-End Development:
Build the visual and interactive components.Move to Back-End Development:
Integrate the server-side logic and ensure smooth communication between the back-end and front-end.Begin Testing Early:
Test features as they’re developed to catch issues early and avoid backtracking.Conduct Final Tests Before Launch:
Perform end-to-end testing to ensure everything works together and meets user expectations.

Choose the Right Tools and Technologies
Selecting the right tools and technologies is one of the most critical steps in the web development resource process. The choices made here will impact the project’s efficiency, scalability, and long-term success. By aligning tools with project requirements, I can ensure the development process runs smoothly and delivers the desired results.
Key Categories of Tools and Technologies

1. Frameworks and CMS
Frameworks and content management systems (CMS) provide the foundation for web development. Choosing the right one depends on the project’s purpose, complexity, and customization needs.
Examples of Frameworks:
Laravel: Ideal for robust and scalable web applications.
React.js: Perfect for dynamic, interactive user interfaces.
Django: A high-level Python framework for rapid development and clean design.
Examples of CMS:
WordPress: Best for blogs, portfolios, and small business websites. Its vast plugin ecosystem simplifies customization.
Shopify: Tailored for e-commerce projects with built-in payment and inventory management.
Drupal: Suitable for large-scale websites requiring complex content organization.
Tip: For a simple blog, WordPress is often sufficient. However, for a high-performance web app, a framework like React or Laravel might be the better choice.
2. Collaboration Tools
Effective communication and task management are vital for any web development project. Collaboration tools help keep everyone on the same page.
Popular Tools:
Slack: A messaging platform for real-time communication, ideal for remote teams.
Trello: A simple task management tool using boards, lists, and cards for project organization.
Asana: A more robust platform for managing complex workflows and assigning tasks.
Example in Action:
When managing a team building an e-commerce website, I used Trello to organize tasks into categories like “To-Do,” “In Progress,” and “Completed.” This provided a clear visual representation of progress and ensured deadlines were met.
3. Code Management Tools
Version control is essential for tracking changes and collaborating on code. These tools enable developers to work simultaneously without overwriting each other’s work.
Top Picks:
GitHub: A widely used platform for hosting and reviewing code, managing projects, and collaborating with teams.
GitLab: Similar to GitHub but with additional features like built-in CI/CD for automating testing and deployment.
Why It’s Important:
When developing a membership site, I relied on GitHub to track changes across multiple branches, ensuring a smooth merge of new features into the main codebase.
Tips for Selecting the Right Tools
Evaluate Project Complexity
For simple projects, stick to tools that require minimal setup (e.g., WordPress for small websites).
For complex applications, opt for frameworks and tools that offer scalability (e.g., Laravel for custom applications).
Prioritize Scalability
Choose technologies that can handle future growth, such as adding new features or accommodating increased traffic.
Consider Team Expertise
Use tools that align with your team’s skill set to minimize the learning curve. If your developers are fluent in Python, Django might be a better choice than Laravel.
Look for Community Support
Select tools with active communities and robust documentation to troubleshoot issues and find solutions easily.
Real-Life Example
On a recent project for a non-profit organization, I combined these tools for a smooth development process:
Framework: Laravel for building a custom donation system.
Collaboration Tools: Slack for team communication and Asana for tracking deliverables.
Code Management: GitHub for managing the team’s contributions and ensuring version control.
This approach ensured a seamless workflow, and the project was delivered on time with all features functioning flawlessly.

Choosing the right tools and technologies is a cornerstone of the web development resource process. By carefully evaluating the project’s requirements, team expertise, and scalability needs, I can build a strong foundation for success. With the right tech stack, development becomes more efficient, collaboration improves, and the final product exceeds expectations.
Plan Your Development Workflow
A well-defined workflow is an essential part of the web development resource process. It helps streamline team collaboration, ensures tasks are completed on time, and ultimately leads to the successful delivery of a website. By choosing the right methodology for the project, I can ensure that the team works cohesively and efficiently throughout the development cycle.
Why a Workflow is Critical in the Web Development Resource Process
The web development resource process involves multiple stages, teams, and tools working together. Without a structured workflow:
Deadlines can slip.
Miscommunication can occur between team members.
Critical tasks might be overlooked.
A proper workflow provides clarity, accountability, and structure, allowing the team to move through each phase of development with confidence.
Common Development Methodologies
1. Agile Development
Agile is a flexible and iterative methodology that works well for projects requiring regular updates and client feedback. It breaks the project into smaller, manageable tasks called "sprints," with each sprint focusing on a specific goal.
How It Fits the Web Development Resource Process:
Agile encourages continuous improvement and adaptability, making it ideal for dynamic projects like e-commerce sites or SaaS platforms.
Regular check-ins (daily standups) ensure the team is aligned and on track.
Benefits:
Fast turnaround for features.
Allows for changes mid-project based on feedback.
Example:
I once used Agile to build a travel booking platform. We released the core booking feature in the first sprint, followed by add-ons like customer reviews and loyalty programs in later iterations.
2. Waterfall Development

Waterfall is a linear, structured approach where each phase (planning, design, development, testing, and deployment) is completed before moving to the next. This method works best for projects with clearly defined requirements and minimal expected changes.
How It Fits the Web Development Resource Process:
Waterfall provides a clear roadmap, ensuring that resources are allocated efficiently and milestones are met.
Each phase builds on the previous one, minimizing ambiguity.
Benefits:
Straightforward and easy to manage.
Ideal for static websites or projects with fixed requirements.
Example:
For a local business’s website, I used Waterfall to deliver a homepage, about page, and contact form, all with clearly defined goals and minimal changes.
3. Hybrid Models
A hybrid approach combines the flexibility of Agile with the structure of Waterfall. It allows for initial planning (Waterfall) followed by iterative development (Agile) for certain components.
How It Fits the Web Development Resource Process:
The project starts with a clear plan and timeline, but iterative sprints are used for specific features or sections.
Benefits:
Balances structure and adaptability.
Reduces the risk of scope creep while allowing flexibility for client feedback.
Example:
I used a hybrid model to develop a university portal. The fixed components, like student registration, followed Waterfall, while user-facing features, like a campus events calendar, used Agile for flexibility.
Steps to Plan Your Development Workflow

Choose the Right Methodology
Evaluate the project’s complexity, timeline, and client requirements to decide whether Agile, Waterfall, or a hybrid approach works best.
Example: For a content-heavy blog, Agile might be best to roll out features incrementally, while Waterfall works for a static landing page.
Define Clear Milestones
Break the project into phases with specific deliverables at each stage of the web development resource process.
Example: For a portfolio website, milestones might include wireframe approval, homepage development, and final launch.
Assign Roles and Responsibilities
Ensure that every team member knows their role and what is expected of them during each phase.
Example: Front-end developers focus on responsive layouts, while back-end developers handle server-side logic.
Set Timelines and Deadlines
Establish realistic timelines for each phase to ensure the project stays on track.
Example: A two-week sprint might focus on implementing the login system, followed by another sprint for payment integration.
Track Progress with Tools
Use project management tools like Trello, Asana, or Jira to monitor tasks, flag delays, and keep everyone updated.
Example: I create Trello boards with columns for “To Do,” “In Progress,” and “Completed” to visualize the workflow.
Integrating Workflows into the Web Development Resource Process
Regardless of the methodology, a well-planned workflow ensures:
Tasks are completed in the right order, reducing bottlenecks.
Team members collaborate effectively with minimal confusion.
The project delivers high-quality results on time.
Conclusion
And there you have it—the ultimate guide to the web development resource process, served up with a side of wit and wisdom! By now, you should feel equipped to tackle any web project, whether it’s a sleek portfolio, a booming e-commerce site, or a cutting-edge app.
Remember, success isn’t just about having the right tools—it’s about understanding how and when to use them. With a clear workflow, a dream team, and the right resources at your fingertips, you can turn your vision into a digital masterpiece.
So, what’s stopping you? Bookmark this guide, gather your resources, and start building the website you’ve always dreamed of. And don’t forget—when in doubt, debug, optimize, and keep creating.
Recommended Articles
Must-Have Software for Web Developers
The Ultimate Checklist: Preparing to Use a Free HTML Website Maker
How Hard Is It to Make a Website? A Beginner's Guide
Master Your Development Process: The Ultimate Guide to Web App Tools
Essential Website Features: Build Smarter, Convert Faster
Drag-and-Drop Website Builders vs. Coding: Which is Better for You?
SEO Related Articles
11 Benefits of Using SEO Software for Online Business Growth
Master SEO with Topic Clusters: The Ultimate Guide to Boost Rankings
SEO Agency for Tech Startups – Get More Traffic, Leads & Sales Fast
Buy Website Traffic with Search SEO – Get More Clicks, Leads & Profits Fast!
Types of Backlinks: The Good, The Bad & The SEO-Boosting Links You Need
